POST & CORE
One of the most common restoration for Endodontic treatment is post and core which provides a seat for final restoration.

In some cases that after caries removal, we have only one third of crown intact, we have to provide retention and adequate stability by post & core for our final restoration.

A. which cases can approve for post & core
1. NO mobility of tooth
2.No gingival & periodontium problem
3. No radiolucency at apex or sinus tract
4. Tooth must be treated endodontically first:
* Example of the case can approve for post & core : tooth#16
B. When is proper time to proceed for post & core:
*Ecaxtly the meeting that you finish your endodomtic tx cause of proper APICAL SEAL.
C. Steps for post & core procedure:
1. Removal of previous temporary restoration
2.Computation for amount of gutta pecha that must be romoved:
*After removal of final restoration, find a reference point & take x-ray measure by ruler the length from your reference point up to the apex of the root.
*The measured length - 4mm is the amount of gutta percha that shoud be removed.
*4mm Gutta percha should be left at apext of the root for Apical seal.
*For example : The length from your reference point up to the apex is 16mm so 16mm - 4mm = 12 mm gutta pecha must be removed.
3. Choose the ways for gutta percha removal & Remove:
a. Using Gattes Gildden bur ( best & fast way)
b. Using ocaliptus or orange oil ( Slowest way & not suggested)
* Vertical Root Fracture ( VRF) : most common cause of VRf is 1. Applying too much pressure during restoraion of tooth by dentist (iatrogenic) 2. Post & pore procedure (Be careful during using gates gildden burd and applying pressure during procedure). In case of VRF the only treatment is Extraction of the tooth.
*After gutta percha removal , x- ray should be taken to approve the presence of 4mm gutta percha.
4.Clean the canal & Dry with paper point

5. Intracanal impression technique:
a. Post build up
* Apply petroleum jelly by microbrush to ALL canal walls.
* Use self cure resin as your impression material and mix it in dappen dish. (in resin ; the liquid is polymer and the powder is monomer).
* Use the thinned tooth pick for transfering the mixed self cure resin inside the canal. ( use the knife for thinning the tooth pick. For facillity of resin transfering to the canal, try to roll the mixed resin with your palm then place it at the tip of thinned tooth pick).
* Hardening time for self cure resin is 3 min.
* The amount of self cure resin inside the canal should be equal to amount of gutta percha that you removed. For example The length from your reference point up to the apex is 16mm so 16mm - 4mm = 12 mm gutta pecha must be removed SO THE AMOUNT OF SELF CURE RESIN THAT FILLED THE CANAL MUST BE 12MM.
why? because we have to be sure that all the space that we made by removal of gutta percha is filled by self cure resin SO there ganna be NO SPACE between self cure resin and REMAINED 4MM GUTTA PERCHA .This self cure resin is our impression material which ganna be converted to POST in the lab therefore by equal measurement of selfcure resin there will be NO SPACE between POST and REMAINED 4MM GUTTA PERCHA.
How? self cure resin is Radiolucent so we can not measure it by taking X-ray & the only way that we can measure is by ruler; its means to say that remove the self cure resin fom the canal and measure the length by ruler.

b. Core build up:
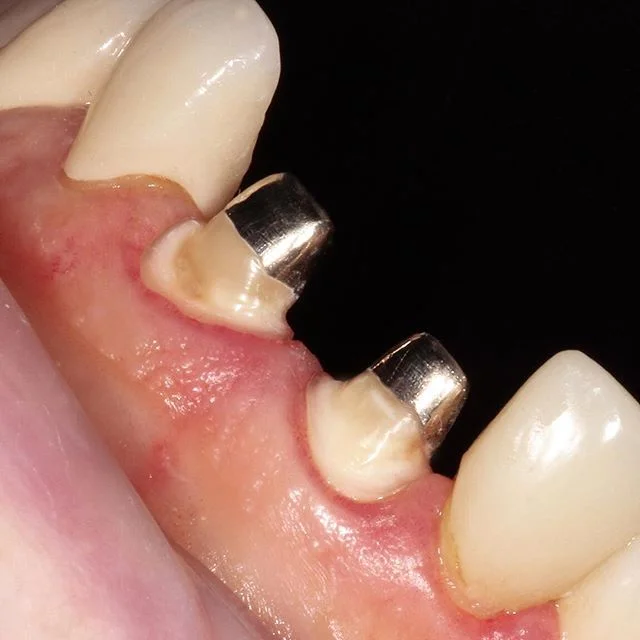
*After you reach the correct measurement of self cure resin as your post build up, by adding self cure resin to you post, you can build up the core.
*Trim the core with prostho bur as you prepare the crown for FPD. Core must Have well defined finishing & Must Be shoulder at Labial & must be chamfer at Lingual ( for metal collar) & Have 2mm space with front tooth ( occlusal reduction).
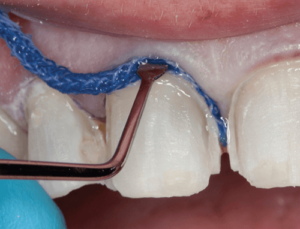
6. Gingival retraction with gingival cord that placed under gingiva with periodontal prob:Gingival retraction with gingival cord that under gingiva with periodontal prob.(for well defining finishing line in the impression)
*Example of placing gingival cord
7. Extracanal impression :
* Alginate or Rubber impression (highly suggested) material can be use.
*Choose proper size of tray for your patient.
*Once your took the impression & during removal of the tray, the interacanal impression (the resin) should be attached to your impression.
*Before you pour the impression, Apply petroleum jelly by microbrush to interacanal impression (the resin).
*pour the impression with dental stone(always submit Die fubricate to improve definition of your finishing line)
* both upper & lower impression should be taken & record the centric relation( bite of the px record by yellow wax).
* occlude your impression with your yellow wax in articulater( simple hinge) & send it to the lab.
8. Dismiss the px with temporary crown and recall for cemention of post & core (Depends on the lab working days)
9. Remove temporary crown & place for try in the prepared post & core that you got from the lab and take x-ray:

* In x-ray the post & core must have NO SPACE with 4mm remained gutta percha.( space called void that can be passage of bacteria).
*Example of accepted post & core (there is NO space ).

*If there is space, try to trim your post & core to minimize the space (Be careful of the pressure that you apply to the tooth to avoid VRF).
*If the space can not be minimize , you shoud repeat from intracanal impression to the rest.
10. Cement the approved post & core to the tooth with with GIC TYPE 1-LUTTING

D. Porcelain Jacket crown over Dowel:
1. Gingival retraction with gingival cord
2. Take final impression with rubber impression from your cemented post & core
3. Both upper & lower impression should be taken & record the centric relation( bite of the px that will record by yellow wax)
4. Occlude your impression with your yellow wax in articulater( simple hinge) .Send it to the lab for construction of metal collar(Die fubricate)
*Dismiss the px with temporary crown & recall the px for cementation of metal collar (depends on lab working days)
*Never use full ceramic or zerconia(metal free) for post & core cause of fracture; It has good esthetic but poor strength.

5. Remove the temporary crown and try in the metal collar:
* Must exactly follow the contour of post & core.
* Trim with polishing bur in case you need some adjusment.
*Example of acceptable metal collar

*Shade selection with shade guide for unglayzed porcelain ( Use shade Guide & follow the color of adjucent teeth) & send it to the lab.(Die fubricate)
*Dismiss the px with temporary crown & recall the px for try in the unglayzed porcelain. (depends on lab working days)
*Example of shade guide

6. Remove the temporary crown and try in the Ungayzed porcelain:
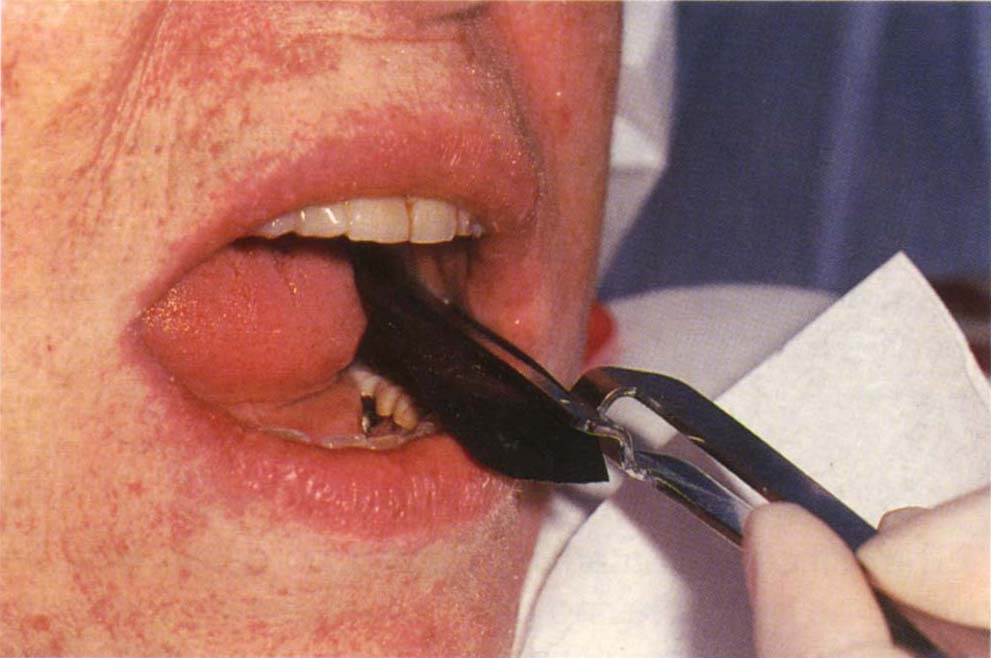
*Check the occlusion with articulating paper ( place the paper & ask the px to bite her/his mouth and do protrusive & lateral proteusive movement).
*Trim with polishing bur in case you need some adjusment( the blue or red colored that defined by articulating paper must trim & avoid of trimming the cusp tip).
*Example of checking the occlusion with articulating paper
*Example of the area that signed by articulating paper
*Must exactly follow the contour of post & core.
*Must follow the color of adjucent teeth.
*Dismiss the px with temporary crown & recall the px for try in the glayzed porcelain. (depends on lab working days).
7.Remove the temporary crown and try in the gayzed porcelain:
*Cement the to the tooth with with GIC TYPE 1-LUTTING.
*Check the occlusion with articulating paper.
*Trim with polishing bur in case you need for adjusment.
*Must exactly follow the contour of post & core.
*Must follow the color of adjucent teeth.
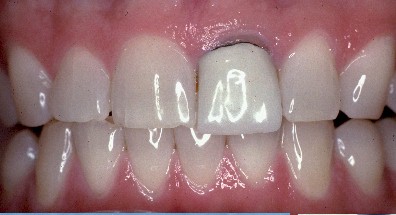
*Example of acceptable Dowel (post&core + PJC)

E. Errors
1. Does not follow the color of adjucent teeth:
*Aesthetic problems.
*patient discomfort specially for front tooth.
2. Does not follow the contour of gingiva:
*Can cause gingival inflammation and gingivitis disease & peridontium problems.
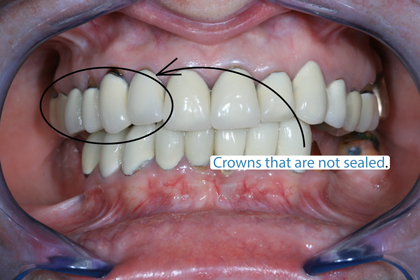
3. Does not well adapted prosthesis:
*Once its not adapted, its has an opening that because GIC TYPE 1 is solouble in saliva can cause dislodgement of prosthesis
*also can be passage of bacteria & food impaction that can cause tooth caries and finally fracture.
4. Facially appearance of prosthesis:
*Can cause Attrition due to too much contact and forcing pressure to front tooth.

6. Malocclusion:
*Premature contact cause extra force to the tooth (through periodontal ligument) once the px bite or during mastication.
*This extra force that applied to PDL everytime cause inflammation of periodontium ( periodontitis) & as advancement cause breakage of lamina dura and widdening of periodontal space & finally formation of cyst .

F. Recall the px after one week
Reference:
Lecture of Dr Jomer Pasol at national university college of dentistry, manila-philippines
برچسبها: Prosthesis